As of today, there are lots of Flutter manuals on the web; yet, most of them presuppose at least the knowledge of some basics, which, surprisingly, aren’t documented in relevant sources.
Here, we aim to fix this shortcoming and offer you a brief Flutter starters guide.
Created by Google, Flutter is a free software development kit for mobile applications. It is open-source and cross-platform, which means it can be used for both Android and iOS. Flutter is based on Dart programming language and is also the main method of developing mobile apps for Google Fuschia.
Beginning from scratch, we will build and launch some applications and learn how to use all the main components, create a unique interface, work with native components, and, finally, release an application for both platforms. If you want to learn some Flutter basics, read on!
About Flutter
Flutter is a young and promising platform, which has already attracted the attention of market leaders. Flutter is simple and fast; it achieves high productivity and development speed due to the number of factors:
– Unlike most known mobile platforms, Flutter doesn’t use JavaScript. Its main programming language is Dart, which compiles into a binary code. This accounts for high operation speed similar to Objective-C, Swift, Java, or Kotlin.
– Flutter doesn’t use native components in any way, so there’s no need to develop any intermediary layers for communicating with them. Instead, it creates its own user interface. Buttons, text, and media elements are all created inside Flutter graphic engine. Having said that, it’s worth mentioning that a basic “Hello World” app written using Flutter is only about 2.5Mb on iOS and approximately 4Mb on Android.
– Flutter uses declarative approach for building user interfaces, inspired by ReactJS web framework and based on widgets (also known as ‘components’ in web application development). For even higher UI acceleration, widgets are redrawn on demand — as soon as any change has been made (similar to React Virtual DOM).
- – Additionally, the framework has a built-in hot-reload feature, common in web-development, but absent, so far, in native platforms.
The practical value of the above-mentioned features is hard to overlook. For example, this article by Android developer who has rewritten his application from Java to Dart, mentions the number of files/lines of code generated using Java – 179/12176 and using Dart – 31/1735, which actually simplifies the code by 85%!
We will not dwell upon the platform’s technical specifications since you can read about them here. Also, here are some more examples of working apps built with Flutter for your consideration.
About Dart
Dart is a programming language Flutter uses to develop applications. It is very simple, especially if you have been using Java or JavaScript, and it’s easy to learn. If you want to get a better understanding of it, A Tour Of A Dart Language is very comprehensive and helpful.
Getting Ready
To begin with, go to Flutter installation guide, choose a platform and follow a step by step instruction for installing a platform on your system. In your Editor add editor plugins. The installation guide includes the VS Code and IntelliJ setup instructions. Run the starter app for a quick test.
About the structure
Now, let’s open the folder with a generated application and examine what we have there (not all its content, but the essentials):
lib/ — according to pub principles (Dart package manager) the entire code resides in this subfolder;
pubspec.yml — here is where all the application dependencies, which have to be installed for its launch, are recorded — just like
package.json, but with one exception: you need to install them through flutter pub get <package_name> command, not through standard Dart utility mentioned above;
test/ — you can launch them using flutter test;
ios/ & android/ — folders containing each of the platform’s setting with indications which rights are needed for application launch (access to location, bluetooth), icons and other platform-specific elements.
Now that we have reviewed the structure, let’s open the lib/ folder containing the main.dart file. This is the file where we will be launching our application. It launches by calling the main() function – just like in C language.
About widgets (Hello World here)
Flutter is based on Widgets, which are the main components for building user interface. There are two types of widgets – stateful widgets and stateless widgets, and you can read more about them here. Let’s start with the basics: delete all the content form main.dart and insert the following code, paying careful attention to the comments:
import 'package:flutter/widgets.dart';

main() => runApp(
  Directionality(
    textDirection: TextDirection.ltr,
    child: Center(
      child: Text('Hello, World!'),
    ),
  ),
);
runApp(…) only accepts the core widget for the project. Hot-reload feature cannot support its changes, so we will have to relaunch an application.
Text(…) — Flutter can’t just display the line on a screen. We need to specify the Text. textDirection to display text. It’s not similar to text-align if we compare it to web development, it’s similar to direction. The API part for internalization of the . Text app won’t work until it doesn’t know the direction, but we won’t have to specify it everywhere – further on we will learn how to set up the text direction for the entire app.
Here we go! If we run an app right now, we will see “Hello, World!” on the screen. But something is definitely wrong.
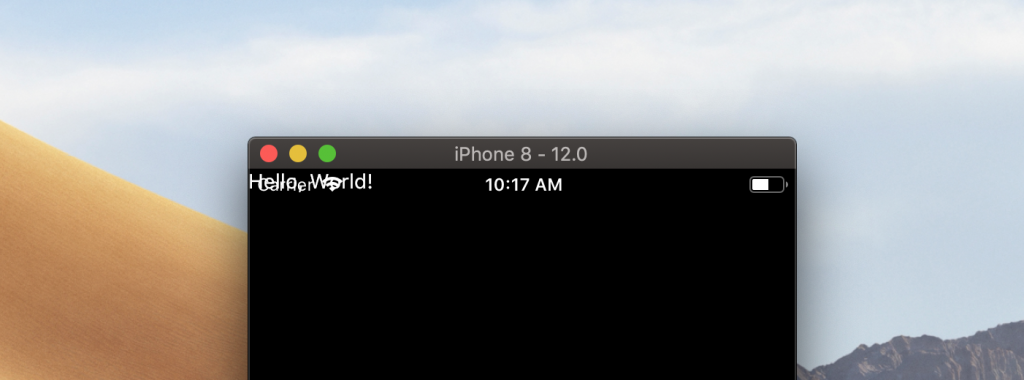
The text overlaps the system information. We have an entire screen at our disposal, but we’ve displayed the widget in its leftmost corner. Now, let’s try to move the text someplace else.
import 'package:flutter/widgets.dart';

main() => runApp(
  Center( // a widget, which aligns content to center
    child: Text(
      'Hello, World!',
      textDirection: TextDirection.ltr,
    ),
  ),
);
Center(…) — is a widget which allows to place another widget passed in child argument vertically and horizontally at the center. You will often come across child and children in Flutter apps since practically all widgets are using these names for passing widgets, which should be displayed inside the called widget.
Widget sets are used in Flutter to create UI, changes in appearance, and even to transfer data. For example, Directionality(…) widget sets the text direction for all the child widgets:
import 'package:flutter/widgets.dart';

main() => runApp(
  Directionality(
    textDirection: TextDirection.ltr,
    child: Center(
      child: Text('Hello, World!'),
    ),
  ),
);
Let’s learn one more important widget that will help us transform the look of our application:
import 'package:flutter/widgets.dart';

main() => runApp(
  Directionality(
    textDirection: TextDirection.ltr,
    child: Container( // new widget! <div> in the world of Flutter
      // For Container widget color property indicates background color
      color: Color(0xFF444444),
      child: Center(
        child: Text(
          'Hello, World!',
          style: TextStyle( // this widget sets the text style
            color: Color(0xFFFD620A), // set the text color
            fontSize: 32.0, // and font size
          ),
        ),
      ),
    ),
  ),
);
Color(…) — This widget sets the color. In Flutter documentation, you can read about different ways to set the color, but it’s mainly achieved through passing a number into a class constructor. In the example, we are passing a number written in hexadecimal format, which is very similar to HEX, only in the beginning there are two more symbols indicating the color transparency level, where 0x00 is absolutely transparent and 0xFF – fully opaque.
TextStyle(…) — This widget is even more interesting: you can set color, size, thickness, line spacing, add underscore, etc.
We have now built our first application with Flutter! You can read how to prepare a release version for Android and iOS and how to submit it to a corresponding Store in Flutter official documentation. If you want to learn more, below there’s some more information on Flutter specifics.
About Stateless Widgets
Now that we have learned how to use widgets, let’s learn how to create them. As mentioned above, there are stateless and stateful widgets. We have only used stateless widgets so far. That doesn’t mean they have no state whatsoever since widgets are just classes and their properties may be changed. It’s just that after a widget has been displayed, changes in its state won’t lead to updating this widget in UI. For example, if we need to change a text on the screen, we have to generate another Text widget and specify the new content that we want to display. These widgets can be called static, so we will start with them.
To create a stateless widget, you have to:
Think of a name for a new class;
Inherit a class from StatelessWidget;
Realize build() method, which takes BuildContext as an argument and returns it into any Widget.
import 'package:flutter/widgets.dart';

main() => runApp(
  Directionality(
    textDirection: TextDirection.ltr,
    child: Center(
      child: MyStatelessWidget()
    ),
  ),
);
Example of a widget with one argument:
// …

class MyStatelessWidget extends StatelessWidget {
  // All Stateless widget properties must be declared with final, or const
  final String name; // ordinary property
  MyStatelessWidget(this.name); // ordinary constructor

  @override
  Widget build(BuildContext context) { // [context] will be described below
    return Text('Hello, $name!');
  }
}
That’s, basically, all we need to know about Stateless widgets.
About Hot Reload
Please note, that upon changing the content of your widget, the application will be automatically recreated. After we have taken the widget out of the main() function, Hot reload has started to assist us.
It is also important to understand that running hot reload module may slow an application down considerably.
About GestureDetector
In the next section, we will talk about StatefulWidgets (widgets that change when their state is changed). We will be changing the state of a widget on touching the screen using GestureDetector(…) – a widget, which creates nothing, but monitors the touches on a smartphone screen and informs about them by calling the functions passed to them.
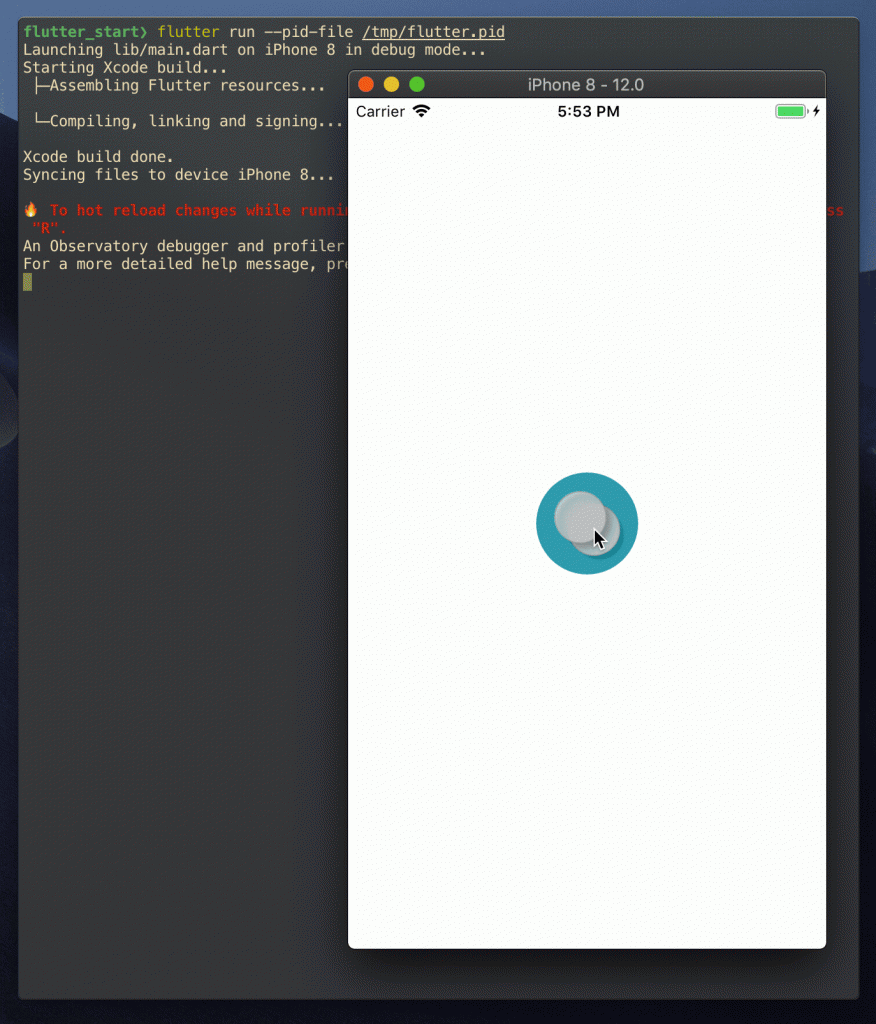
Let’s create a button in the center of the screen, upon pressing which the console will display a message:
import 'package:flutter/widgets.dart';

main() => runApp(
  Directionality(
    textDirection: TextDirection.ltr,
    child: Container(
      color: Color(0xFFFFFFFF),
      child: App(),
    ),
  ),
);

class App extends StatelessWidget {
  @override
  Widget build(BuildContext context) {
    return Center(
      child: GestureDetector( // used like ordinary widget
        onTap: () { // one of GestureDetector properties
          // This method is called, when child element is pressed
          print('You pressed me');
        },
        child: Container( // our button will be a container
          decoration: BoxDecoration( // styling container
            shape: BoxShape.circle, // setting its round shape
            color: Color(0xFF17A2B8), // and painting it blue
          ),
          width: 80.0,
          height: 80.0,
        ),
      ),
    );
  }
}
Press the blue button and see the message on the console!
About Stateful Widgets
StatefulWidgets — are even simpler than StatelessWidgets. Yet, there are some specifics: they don’t exist on their own — to fully function, they need one more class that will store the state of the widget.
To start with, let’s take a look at a widget class:
// …

class Counter extends StatefulWidget {
  // changeable state is stored not in the widget, but inside an object of a specific class,
  // created by createState()method
  @override
  State<Counter> createState() => _CounterState();
  // The function result is not just a State class object,
  // but a State<OurWidgetName>
}
Above, we have created an “empty” widget, which has realized a very simple createState() method. This separation of a state and a presentation lets Flutter optimize the performance of an application.
A stateful widget is very simple, moreover, it’s practically identical to StatelessWidgets that we have created above. Its main characteristic feature is parent class.
// …

class _CounterState extends State<Counter> {
  // Inside of it, we can finally set dynamic variables,
  // where we will store its states.

  // in this case, its touch counter
  int counter = 0;

  // Next, we are implementing the same method for creating widgets that we have used in Stateless widgets class.
  @override
  Widget build(BuildContext context) {
    // here, almost nothing has changed compared to our former example    // except for some minor tweaks:
    return Center(
      child: GestureDetector(
        onTap: () {
          // When the button is pressed, we increase the value of
          // counter variable.
          setState(() {
            // setState() needed to call methods
            // of widget’s lifecycle and tell it it’s time to refresh
            ++counter;
          });
        },
        child: Container(
          decoration: BoxDecoration(
            shape: BoxShape.circle,
            color: Color(0xFF17A2B8),
          ),
          width: 80.0,
          child: Center(
            child: Text( // display the counter property value
              '$counter', // to track its changes
              style: TextStyle(fontSize: 30.0),
            ),
          ),
        ),
      ),
    );
  }
}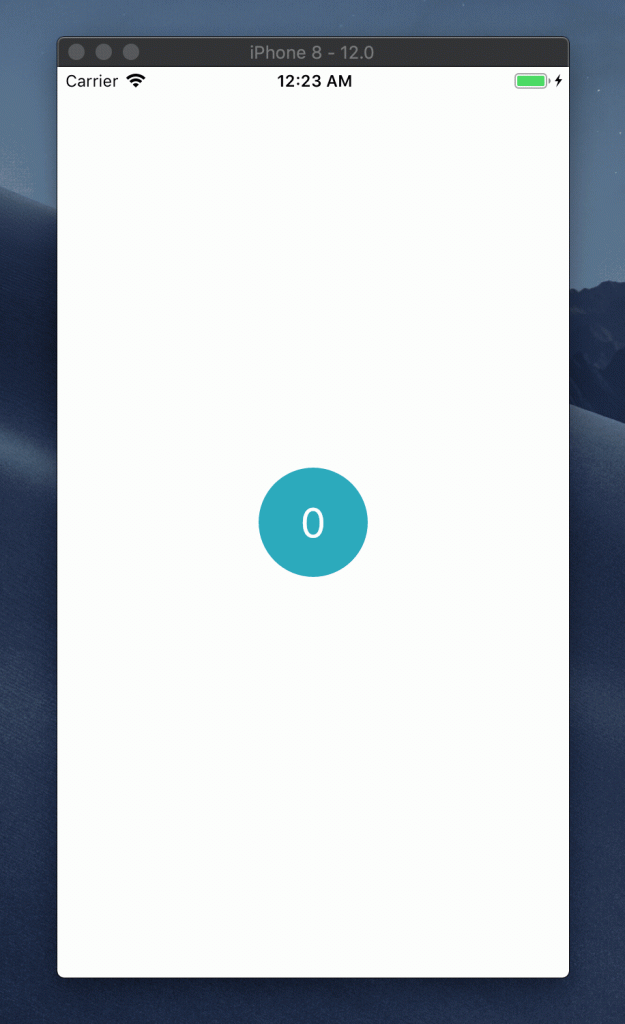
Also, please note that the name of the class starts with an underscore. In Dart, all names starting with underscores identify private values. Widget states in Flutter are usually private, although it’s not mandatory.
By now, you should have some understanding of Flutter basics. But before we finish, let’s take a look at some more widgets. This time we will write some more code — just for fun!
import 'package:flutter/widgets.dart';

main() => runApp(App());

class App extends StatelessWidget {
  @override
  Widget build(BuildContext context) {
    return Directionality(
      textDirection: TextDirection.ltr,
      child: Container(
        padding: EdgeInsets.symmetric(
          vertical: 60.0,
          horizontal: 20.0,
        ),
        color: Color(0xFFFFFFFF),
        child: Content(),
      ),
    );
  }
}

class Content extends StatelessWidget {
  @override
  Widget build(BuildContext context) {
    return Column(
      children: [
        Counter('Manchester United'),
        Counter('Juventus'),
      ],
    );
  }
}

class Counter extends StatefulWidget {
  final String _name;
  Counter(this._name);

  @override
  State<Counter> createState() => _CounterState();
}

class _CounterState extends State<Counter> {
  int count = 0;

  @override
  Widget build(BuildContext context) {
    return Container(
      margin: EdgeInsets.only(bottom: 10.0),
      padding: EdgeInsets.all(4.0),
      decoration: BoxDecoration(
        border: Border.all(color: Color(0xFFFD6A02)),
        borderRadius: BorderRadius.circular(4.0),
      ),
      child: Row(
        mainAxisAlignment: MainAxisAlignment.spaceBetween,
        children: [
          // widget — this is a property of a State class, where
          // the link to an object that has created a current state (i.e. our widget) is stored
          _CounterLabel(widget._name),
          _CounterButton(
            count,
            onPressed: () {
              setState(() {
                ++count;
              });
            },
          ),
        ],
      ),
    );
  }
}

class _CounterLabel extends StatelessWidget {
  static const textStyle = TextStyle(
    color: Color(0xFF000000),
    fontSize: 26.0,
  );

  final String _label;
  _CounterLabel(this._label);

  @override
  Widget build(BuildContext context) {
    return Text(
      _label,
      style: _CounterLabel.textStyle,
    );
  }
}

class _CounterButton extends StatelessWidget {
  final _count;
  final _onPressed;
  _CounterButton(this._count, {@required this._onPressed});

  @override
  Widget build(BuildContext context) {
    return GestureDetector(
      onTap: () {
        _onPressed();
      },
      child: Container(
        padding: EdgeInsets.symmetric(horizontal: 6.0),
        decoration: BoxDecoration(
          color: Color(0xFFFD6A02),
          borderRadius: BorderRadius.circular(4.0),
        ),
        child: Center(
          child: Text(
            '$_count',
            style: TextStyle(fontSize: 20.0),
          ),
        ),
      ),
    );
  }
}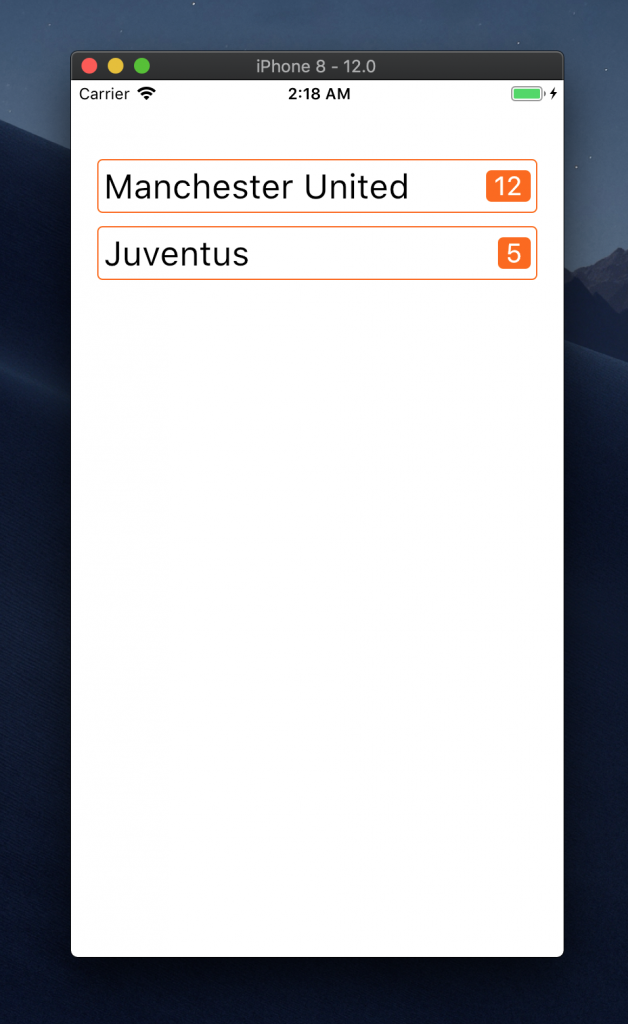
Here we have two new widgets Column() and Row(), and it’s pretty simple to figure out what they do. Last but not least, here are some blogs and resources which you may find interesting if you want to start building Flutter apps like a pro:
1) Official Flutter documentation. We refer to it throughout this article, but we’ll just list it here one more time.
2) A Tour Of A Dart Language. Also mentioned above, this overview will deepen your understanding of a programming language Flutter uses.
3) Stateful or Stateless Widgets? A blog by Joe Birch, also very insightful.
4) Flutter Pros and Cons. A Hackernoon overview – helpful if you’re still indecisive.
5) Flutter on Medium. A link to a Flutter community on Medium with related discussions and resources.
Source:
https://m.habr.com/post/430918/


13 Comments
kamagra nz commande en ligne
générique kamagra en vente libre usa
canadian pharmacies sell enclomiphene
buy enclomiphene cheap store
discount androxal buy germany
buy cheap androxal canada suppliers
buy cheap dutasteride australia over the counter
order dutasteride cheap canadian pharmacy
buying canadian flexeril cyclobenzaprine
buy flexeril cyclobenzaprine generic form
purchase fildena generic alternatives
buying fildena purchase online from india
ordering gabapentin generic mastercard
order gabapentin generic uk buy
cheap staxyn purchase prescription
staxyn in chicago over the counter
ordering itraconazole australia pharmacy
how to buy itraconazole generic pharmacy usa
generic avodart no prescription needed
purchase avodart buy generic
ordering rifaximin buy sydney
order rifaximin buy adelaide
ordering xifaxan generic mexico
discount xifaxan generic order
další den fedexová doprava za kamagra
kamagra předpis kanady
Comments are closed.