The original article may be found here.
There are quite a few articles on the topic of JNI at the ‘Hello World’ level, but there’s an obvious lack of guides on how to port real libraries, debug native code in JNI, reverse the work of a library when there is no source code, and how to work with multithreading when using JNI. In general, the subject is very broad and interesting, and I plan to write a series of articles on the above-mentioned topics.
I will start this series of articles by describing how to port a C library for working with OpenCAN called CANopenSocket.
Introduction
I would like to cover all the questions and tasks that arise when porting libraries via JNI and using them in Java. I also want the material to be useful both for the developers who do not come across JNI too often and for those who are already familiar with the subject.
Why did I choose CAN? For me, the answer is simple: because porting of C libraries for the web is not very common these days, but for embedded projects, you have to constantly deal with C code and libraries. The topic of automotive and IoT is now in high demand and many people are already coming to the conclusion that using Python for production projects is not a very good idea. For prototyping it is superb, but for production, everyone is now returning to the good old C and C ++, and C is still the main language for cross-platform libraries.
Oddly enough, Java is increasingly being used in devices that use CAN buses, especially for Master devices. For this reason, I decided to cover the subject of CAN buses: it has everything that is needed for tasks with asterisks, and every car has a CAN bus and often multiple ones. I think it will be interesting for everyone to make some kind of a device for their car or to understand how it all works and communicates with each other.
Tools and environment
MacOS or Linux (I will do most of it with MacOS, but I will not forget about Linux either)
XCode or GCC
Eclipse JDT + CDT (IntelliJ can also be used)
JDK 8+
Basic things about JNI
If you’ve already written anything about using the Java Native Interface, you can skip this section.
There are many definitions of Java Native Interface and this is how it is described in the official documentation:
Java Native Interface (JNI) is a standard programming interface for writing Java native methods and embedding the Java virtual machine into native applications. The primary goal is the binary compatibility of native method libraries across all Java virtual machine implementations on a given platform.
The official documentation is very helpful and should be at hand:
- Java 8 Native Interface Specification
- Java 9 Native Interface Specification
- Java 11 Native Interface Specification
I like the JNI definition describing it as a framework that allows Java to access working with code, dynamic libraries written in compiled languages better (many specify the C-like languages, but I happened to see integration with libraries written in Pascal. This goes beyond the scope of the article, but we will cover this in some future articles if you find it interesting).
In general, I strongly recommend not using JNI in any of your projects, it is more like a last resort. If the only argument you have is that it will work faster as it will call the native code in the JVM, I do suggest that you abandon the idea entirely. You probably won’t get a performance gain (JNI Overhead), but there will be a lot of hassle.
Before writing the code, let alone debugging the code, you need to understand how the different layers of your favorite programming language or platform are architected and how they communicate. The most important thing in JNI is to understand how we can transfer data from Java to native code and from native code back to Java. In a nutshell, you need to know everything about data sharing and have a solid understanding of how it all is stored in the memory.
When you embark on the path of a native code, understanding how and what lies in the memory, as well as how to manipulate it correctly, is probably the most essential. In general, this is fundamental knowledge, which should be pretty much the same regardless of the platform.
I chose C for myself since, in my opinion, it is the most cross-platform language that currently exists. For this reason, I will write all the native part examples in C.
In order to better understand the theory, I always start with practice, because abstract theory can never substitute practical knowledge. I suggest that we write a small C application and then port its use to Java by calling native functions.
There’s no escaping ‘Hello World’
Let’s write a C program that reports the area of a quadrangle. To do this, we take our Eclipse CDT, create an empty project, and develop our geometry library. If you want to skip, you can download the sources here (JNIBattleWay_Unit1), but if you are reading this section, then I would advise you to do it yourself.
main.c:
#include <stdio.h>
#include <stdlib.h>
#include “geometry.h”
int main(void) {
t_rectangle rec;
rec.width = 5;
rec.heigh = 3;
rec.x = 5;
rec.y = 10;
int area = get_rectangle_area(&rec);
printf(“Area: %d\n”, area);
return EXIT_SUCCESS;
}
geometry.h:
#include <stdio.h>
#include <stdlib.h>
typedef struct {
int x, y;
int width, heigh;
} t_rectangle;
int get_rectangle_area(t_rectangle *rectangle);
geometry.c:
#include “geometry.h”
int get_rectangle_area(t_rectangle *rectangle)
{
return rectangle->width * rectangle->heigh;
}
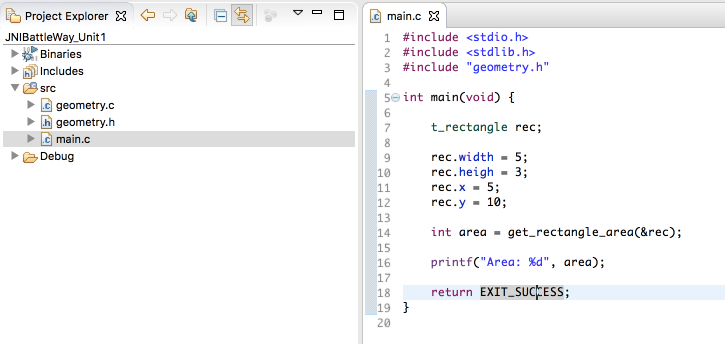
Everything works. Now let’s create a dynamic native geometry library and integrate it into Java. Let’s create a Java project, then create a class describing Rectangle in it and add a Geometry class in which we will add a call to the native code through the getRectangleArea method.

On the Java side, everything is simple now, moving on to the C part:
1. We describe our application for calculating the area of a rectangle, but we will use the calculation function which we earlier wrote in geometry.c
package com.units.geometry;
public class Rectangle {
public int x;
public int y;
public int width;
public int height;
}
package com.units.geometry;
public class Geometry {
public native int getRectangleArea(Rectangle rectangle);
}
package com.units;
import com.units.geometry.Geometry;
import com.units.geometry.Rectangle;
public class JNIBattleWay {
public static void main(String[] args) {
System.out.println(“Hello World”);
System.loadLibrary(“geometry.1.0”);
System.out.println(“geometry lib online”);
Rectangle rec = new Rectangle();
Geometry geometry = new Geometry();
rec.width = 10;
rec.height = 4;
int area = geometry.getRectangleArea(rec);
System.out.println(“Area: ” + String.valueOf(area));
}
}
2. You need to create a header file in which the descriptions of the wrapping functions will be generated. In the future, our task is to describe the wrapper functions through which a bridge that provides a connection between the native code and the JVM is provided.
There are many articles on this subject, and you can study this issue in detail, but we will focus only on the structure of the parameters passed to these wrapper functions and on how it all is stored in memory, and on how pointers to JVM objects work. In Java 8, the generation of header files is done directly through javac. In earlier versions you will still need to use javah:
cd src/com/units/geometry/
javac Geometry.java Rectangle.java -h .
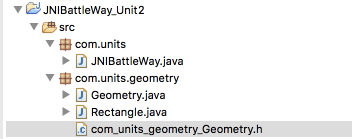
After fulfilling the command, you will get a header file:
3. We now need to convert the project to Convert to a C / C ++ Project (Adds C / C ++ Nature)
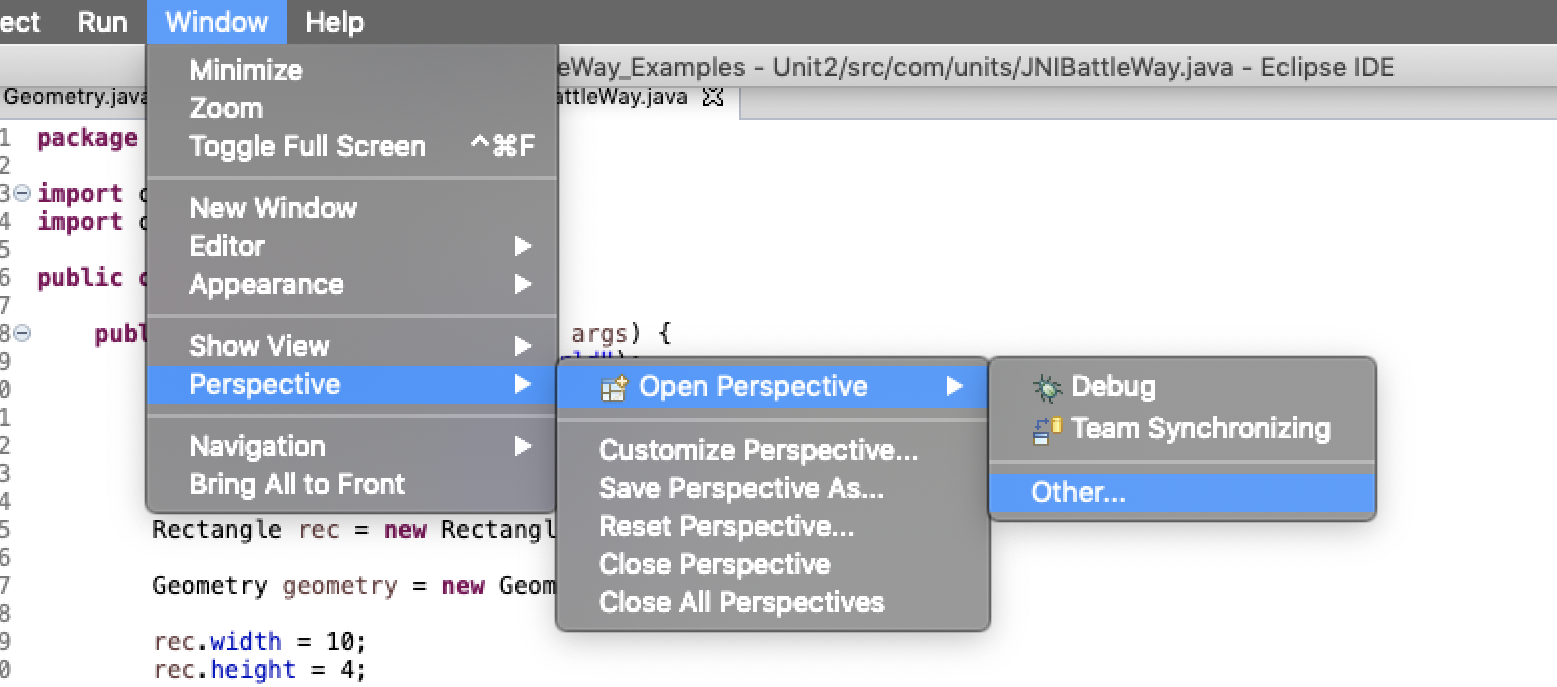
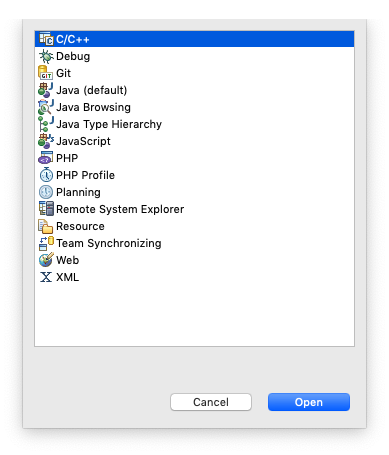
1. Switch to C / C ++ view: Window → Perspective → Open Perspective → Other → C / C ++
2. Right click on the project → New → Convert to a C / C ++ Project (Adds C / C ++ Nature)
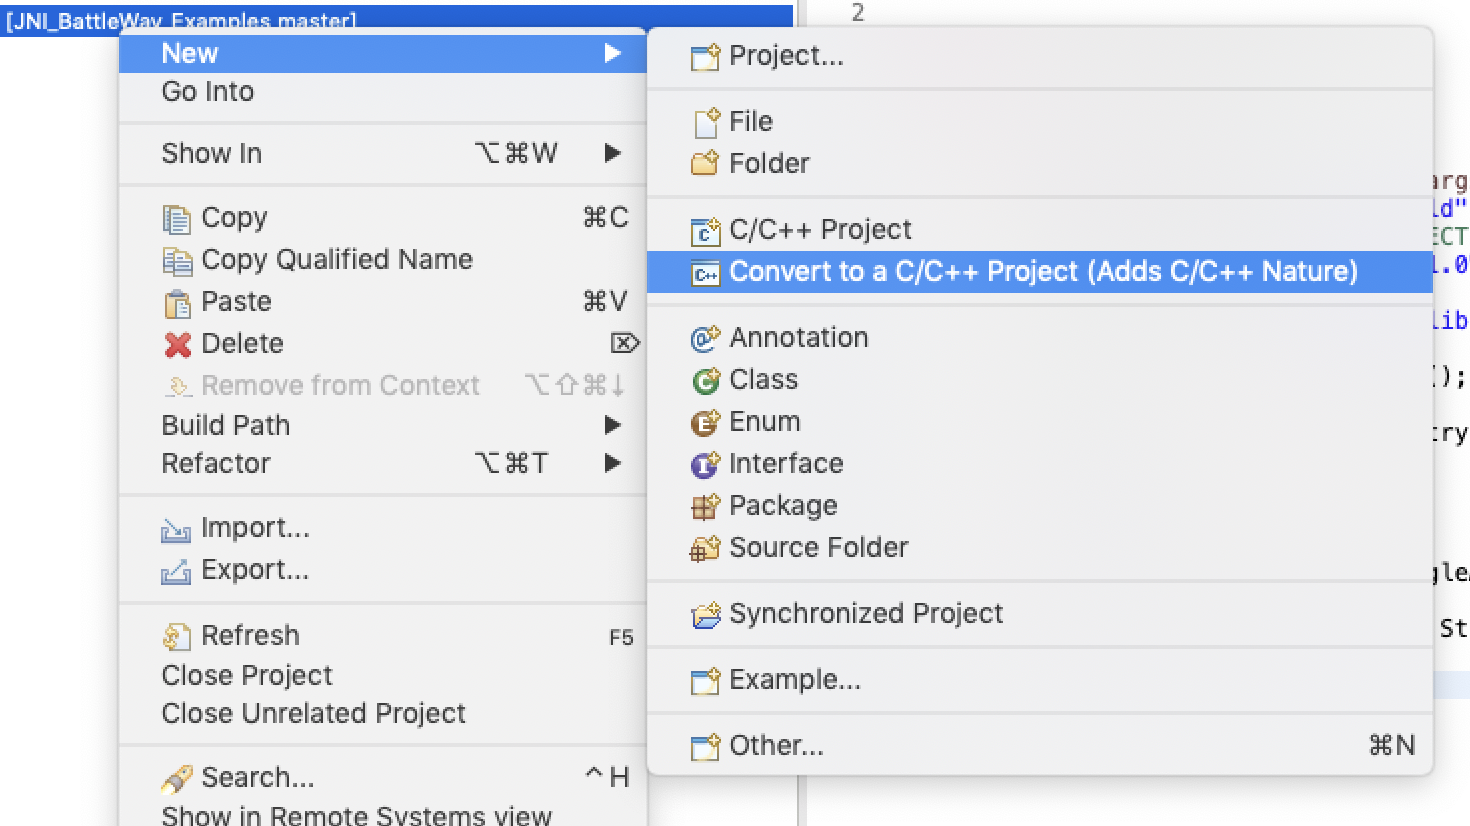
or New -> Other -> C / C ++ -> Convert to a C / C ++ Project (Adds C / C ++ Nature)
3. C Project → Makefile project → MacOSX GCC or Linux GCC respectively for Linux
If you are not using CDT, then you can use any other IDE for C or just use VIM ?
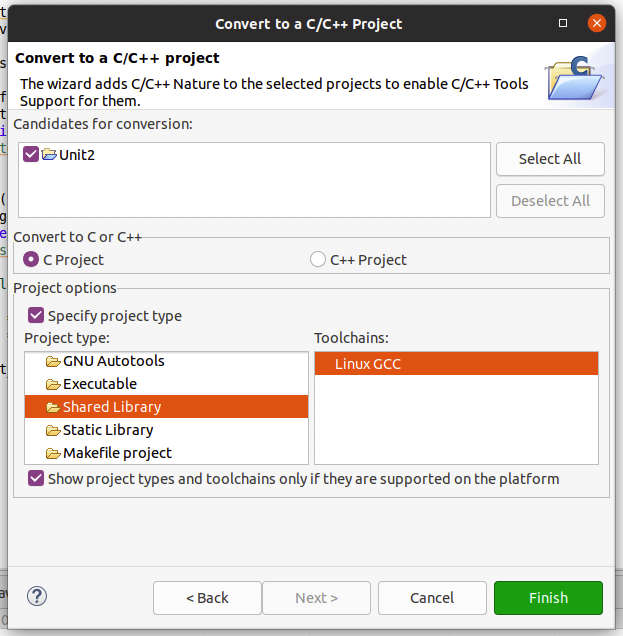

4. Let’s configure C / C ++ Build. Turn on Generate Makefiles automatically
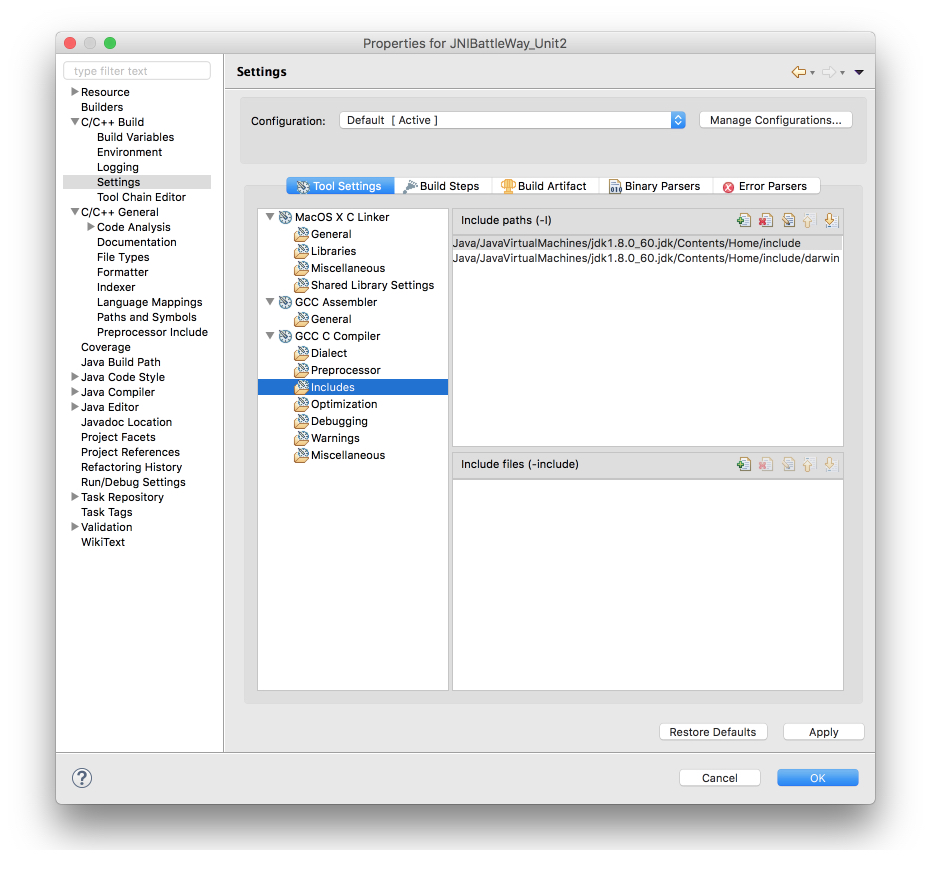
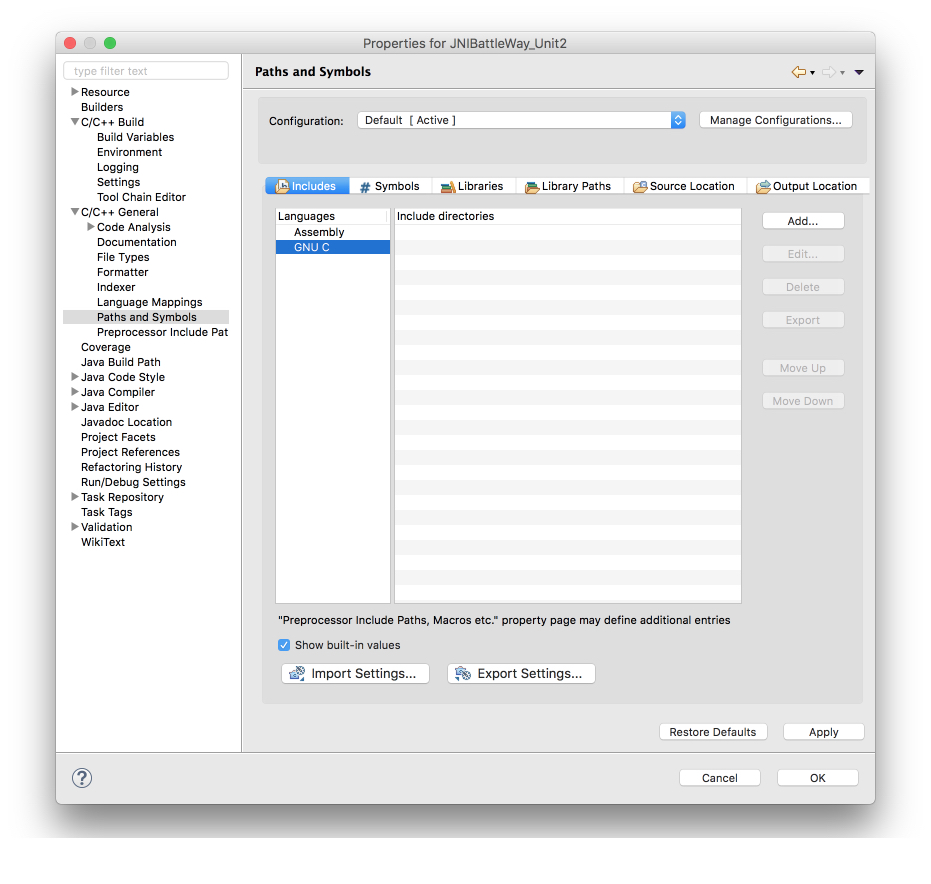
5. It is necessary to register the paths to the JNI header files for the editor and collector to work correctly.
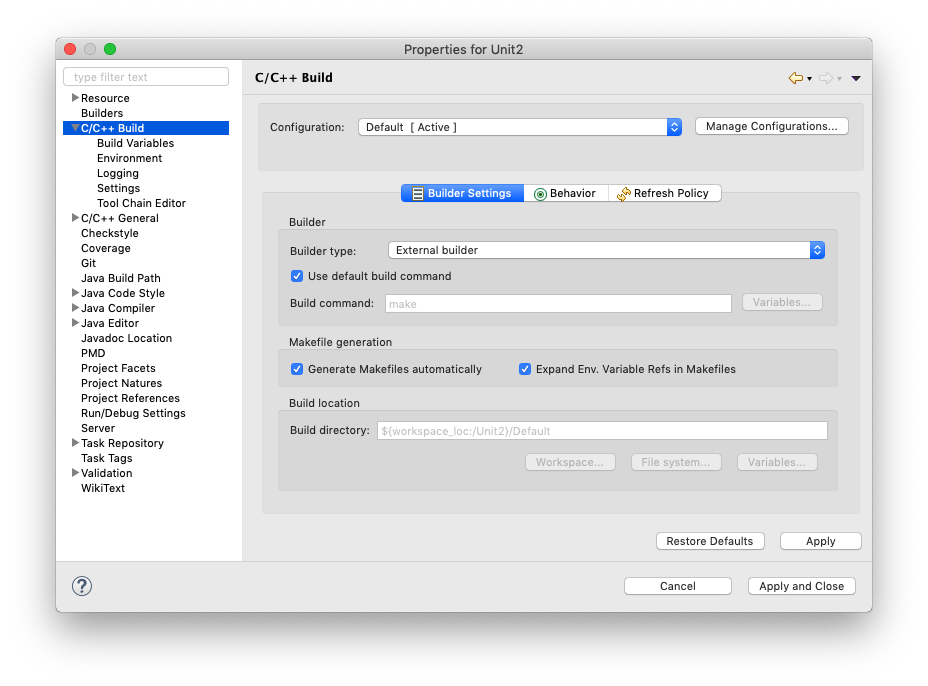

Properties -> C / C ++ General -> Paths and Symbols -> Includes and check the paths in Properties -> C / C ++ Build -> Settings -> Tool Settings -> GCC C Compiler -> Includes
You need to register the path for Mac (JAVA_HOME on a Mac it is usually /Library/Java/JavaVirtualMachines/jdk1.8.X.jdk/Contents/Home/):
[JAVA_HOME]/include
[JAVA_HOME]/include/darwin
For Linux:
[JAVA_HOME]/include
[JAVA_HOME]/include/linux
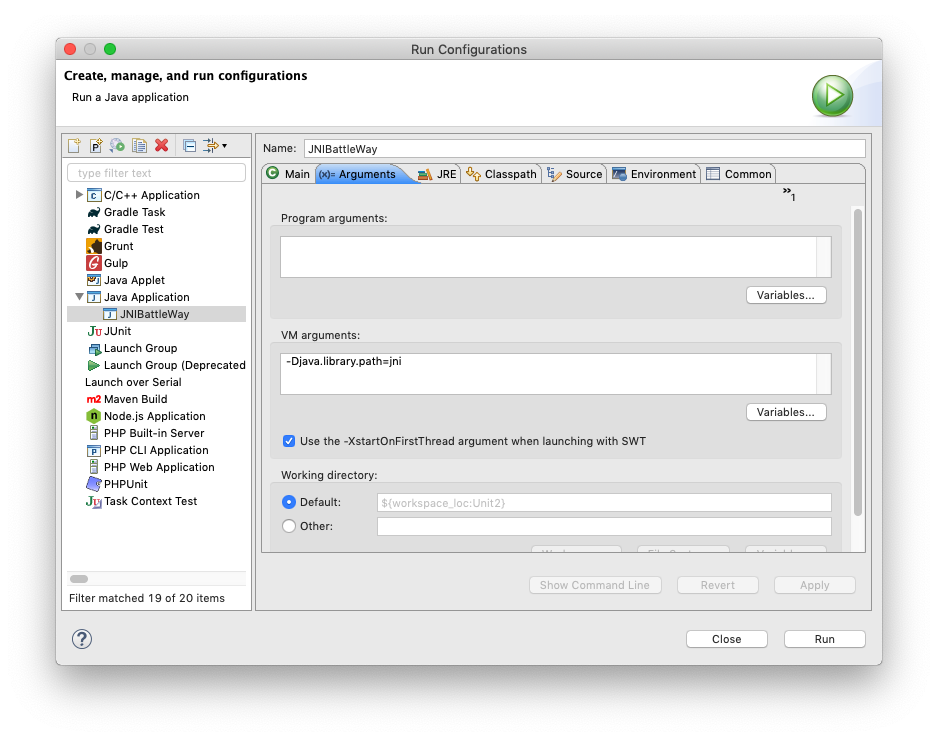
6. Create a folder at the root of the jni project and transfer our com_units_geometry_Geometry.h, geometry.h, geometry.c into it (from our first C application). And we write arguments -Djava.library.path = jni in VM (this is the path where our library will be located, and if you have a different Target of the assembly, write your relative or absolute path. This is necessary to correctly find the library when calling System.loadLibrary )
7. Building the library. Here you can use the standard CDT tools and generate a makefile. In this case, I will lay out my makefile which you can use in combat projects or to fit your needs.
TARGET = geometry
#————————————————
# Version
#————————————————
LIB_MAJOR = 1
LIB_MINOR = 0
#————————————————
# Debug code generation
#————————————————
DEBUG = 1
#————————————————
# absolute or relative path to project root directory
#————————————————
PRJ_DIR = .
#————————————————
# Object directory
#————————————————
OBJ_DIR = $(PRJ_DIR)/objs
######## !!!!!!!! Remove
JAVA_HOME = /Library/Java/JavaVirtualMachines/jdk1.8.0_202.jdk/Contents/Home
ifeq ($(JAVA_HOME),)
ERR := $(error Not found path to JDK. Please check JAVA_HOME)
endif
#————————————————
# Debug flags
#————————————————
ifeq ($(DEBUG), 1)
GDB_FLAG = -g3 -ggdb3 -O0
OPTIMIZE = -O0
else
GDB_FLAG =
OPTIMIZE =
endif
#————————————————
# Detect the OS
#————————————————
ifeq ($(OS),Windows_NT)
CCFLAGS += -D WIN32
ifeq ($(PROCESSOR_ARCHITEW6432),AMD64)
CCFLAGS += -D AMD64
LFLAGS += -shared -Wl,–out-implib,$(LIBNAME)$(LIB_MAJOR).$(LIB_MINOR).a
LIBNAME = lib$(TARGET).
LIBSUFF = .dll
else
ifeq ($(PROCESSOR_ARCHITECTURE),AMD64)
CCFLAGS += -D AMD64
endif
ifeq ($(PROCESSOR_ARCHITECTURE),x86)
CCFLAGS += -D IA32
endif
endif
else
UNAME_S := $(shell uname -s)
UNAME_V := $(shell uname -v)
ifeq ($(UNAME_S),Linux)
CFLAGS += -D LINUX -D TARGET=”$(UNAME_V)”
INC_DIR += -I $(JAVA_HOME)/include -I $(JAVA_HOME)/include/linux
LFLAGS += -shared
LIBNAME = lib$(TARGET).so.
LIBSUFF =
endif
ifeq ($(UNAME_S),Darwin)
CFLAGS += -D OSX -D TARGET=”$(UNAME_V)”
INC_DIR += -I $(JAVA_HOME)/include -I $(JAVA_HOME)/include/darwin
LFLAGS += -single_module -dynamiclib -undefined dynamic_lookup
LIBNAME = lib$(TARGET).
LIBSUFF = .dylib
endif
UNAME_P := $(shell uname -p)
ifeq ($(UNAME_P),x86_64)
CCFLAGS += -D AMD64
endif
ifneq ($(filter %86,$(UNAME_P)),)
CCFLAGS += -D IA32
endif
ifneq ($(filter arm%,$(UNAME_P)),)
CCFLAGS += -D ARM
endif
endif
#————————————————
# Compiler settings
#————————————————
CC = $(CROSS)gcc
#————————————————
# Include directory for header files
# INC_DIR += -I $(PRJ_DIR)/common
#————————————————
INC_DIR += -I .
#————————————————
# Warning level
#————————————————
WARN = -Wall
WARN += -Wextra
WARN += -std=c99
#————————————————
# Compiler flags
#————————————————
CFLAGS += $(GDB_FLAG) $(OPTIMIZE) $(WARN) $(INC_DIR)
CFLAGS += -fPIC -c
#————————————————
# Linker flags
#————————————————
LFLAGS +=
#————————————————
# COM source files
#————————————————
COM_SRC = com_units_geometry_Geometry.c \
geometry.c
#————————————————
# generate list of all required object files
#————————————————
TARGET_OBJS = $(patsubst %.c,$(OBJ_DIR)/%.o, $(COM_SRC))
#————————————————
# Rules
#————————————————
all: compiling $(TARGET_OBJS)
@echo – Linking $(LIBNAME)$(LIB_MAJOR).$(LIB_MINOR)$(LIBSUFF)
@$(CC) $(LFLAGS) -o ./$(LIBNAME)$(LIB_MAJOR).$(LIB_MINOR)$(LIBSUFF) $(TARGET_OBJS)
show:
@echo JAVA_HOME:
@echo $(JAVA_HOME)
@echo TARGET_OBJS:
@echo $(TARGET_OBJS)
@echo INC_DIR:
@echo $(INC_DIR)
compiling:
@echo Build Target: $(TARGET)
install:
@ if [[ $EUID -ne 0 ]]; then \
echo “Must be run as root”; \
exit 1; \
fi
cp -p $(LIBNAME)* /usr/local/lib
clean:
@rm -f lib$(TARGET)*.*
@rm -f $(OBJ_DIR)/*.d
@rm -f $(OBJ_DIR)/*.o
@rm -f $(OBJ_DIR)/*.elf
$(OBJ_DIR)/%.o : %.c
@echo – Compiling : $(<F)
@$(CC) $(CFLAGS) $ < -o $@ -MMD
8. We describe our JNI Wrapper:
#include “com_units_geometry_Geometry.h”
#include “geometry.h”
JNIEXPORT jint JNICALL Java_com_units_geometry_Geometry_getRectangleArea
(JNIEnv *env, jobject obj, jobject jrectangle)
{
jclass cls = (*env)->GetObjectClass(env, jrectangle);
jfieldID fidInt = (*env)->GetFieldID(env, cls, “width”, “I”);
jint jwidth = (*env)->GetIntField(env, jrectangle, fidInt);
printf(“Width: %d\n”, jwidth);
fidInt = (*env)->GetFieldID(env, cls, “height”, “I”);
jint jheight = (*env)->GetIntField(env, jrectangle, fidInt);
printf(“Height: %d\n”, jheight);
t_rectangle rec;
rec.width = jwidth;
rec.heigh = jheight;
return get_rectangle_area(&rec);
}
9. Now we are building our library. I prefer to build from the console, but you can build through the IDE:
make all
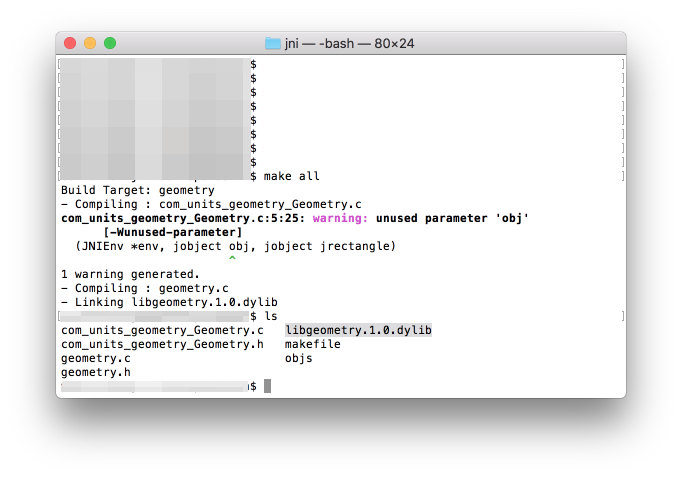
You can adjust the level of warnings in the makefile
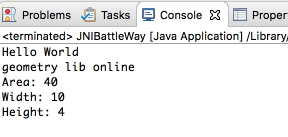
10. Now we launch our Java application and you should see it in the console:
Configuring the library build via Eclipse CDT
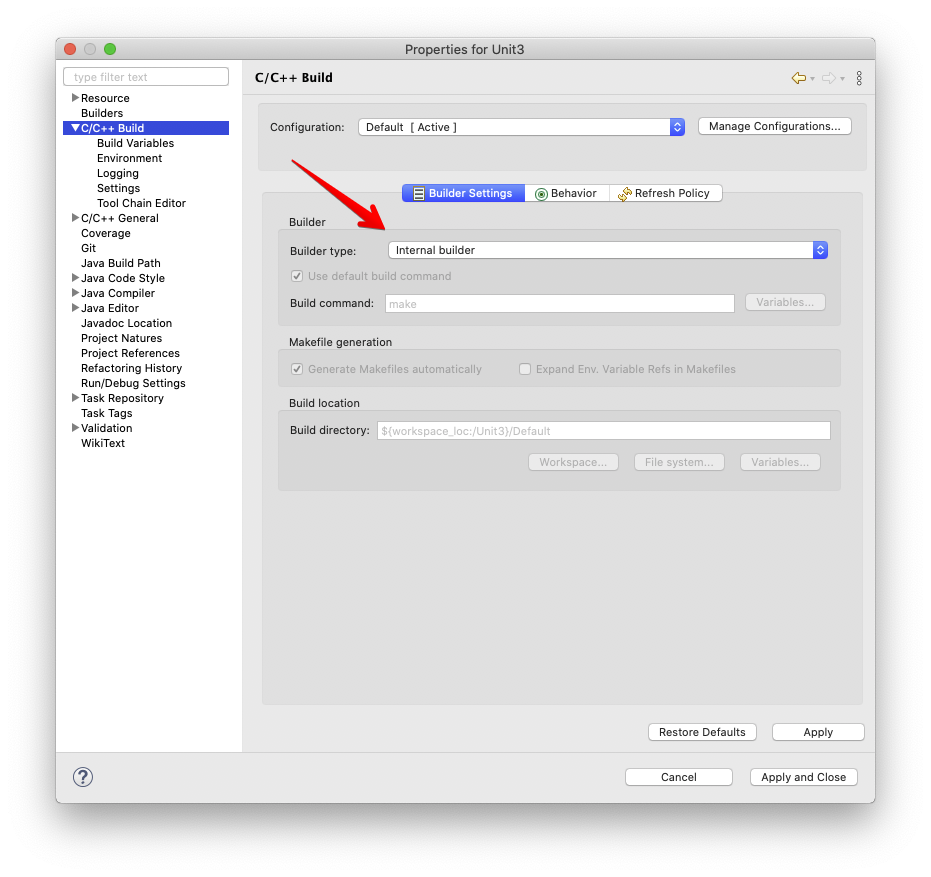
1. In the project settings (Properties -> C / C ++ Build -> Builder Settings -> Builder Type), we specify the use of the “Internal Builder”
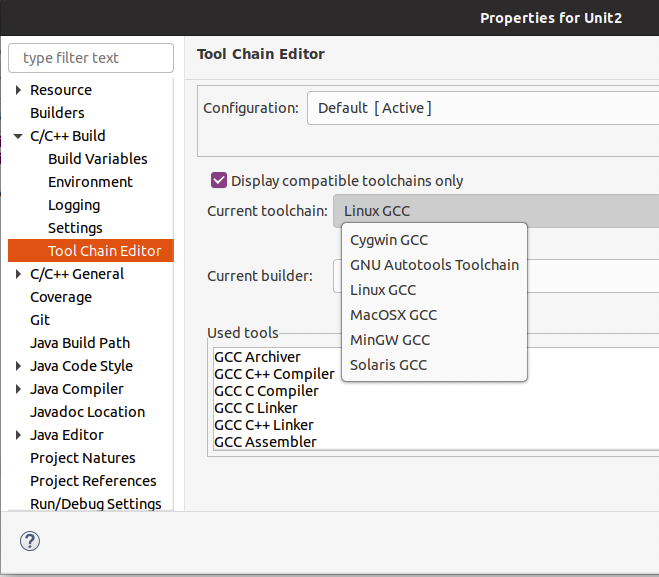
2. For Linux, make sure you have the correct Tool Chain Editor selected:
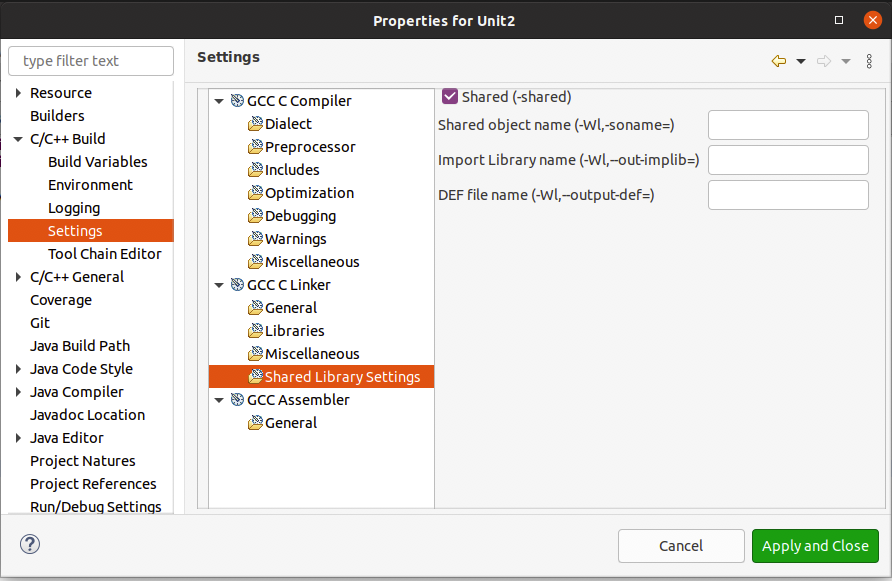
3. We indicate that we will assemble the Shared Library (Properties -> C / C ++ Build -> Settings -> Shared Library Set
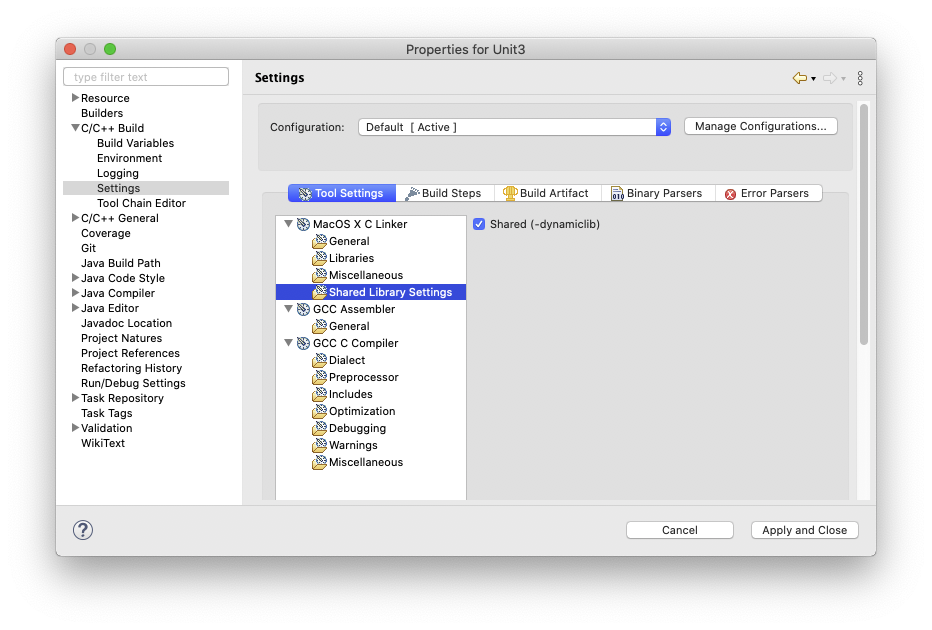
for Linux
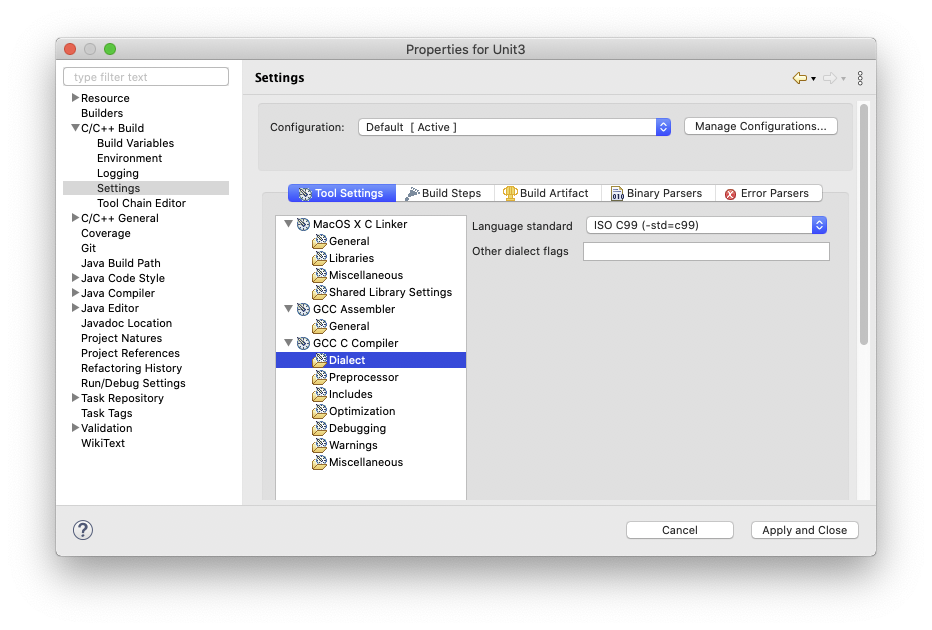
4. Specifying the ISO C99 standard
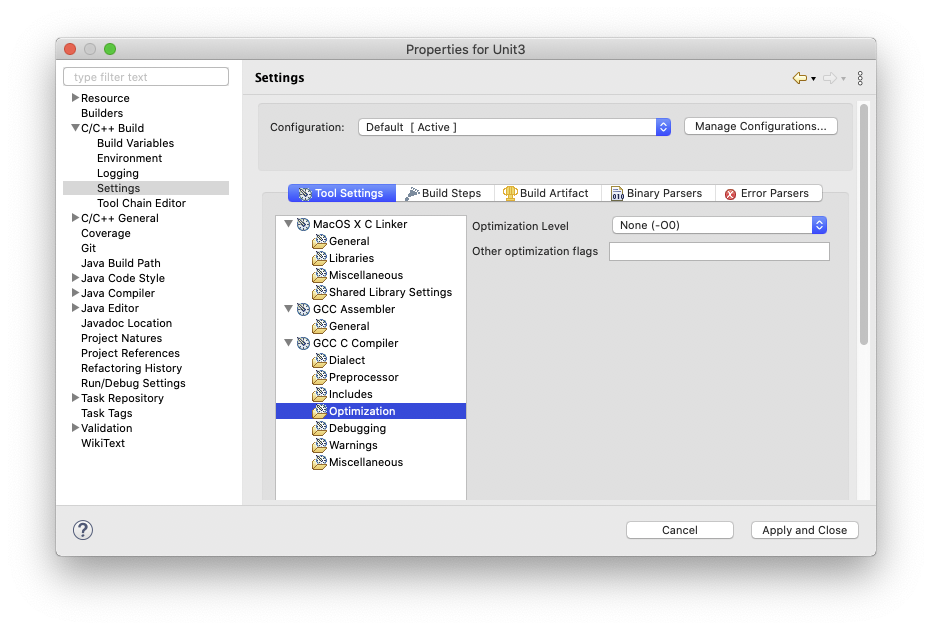
5. For debugging, we need to disable build optimizations
6. Specify the debug level G3
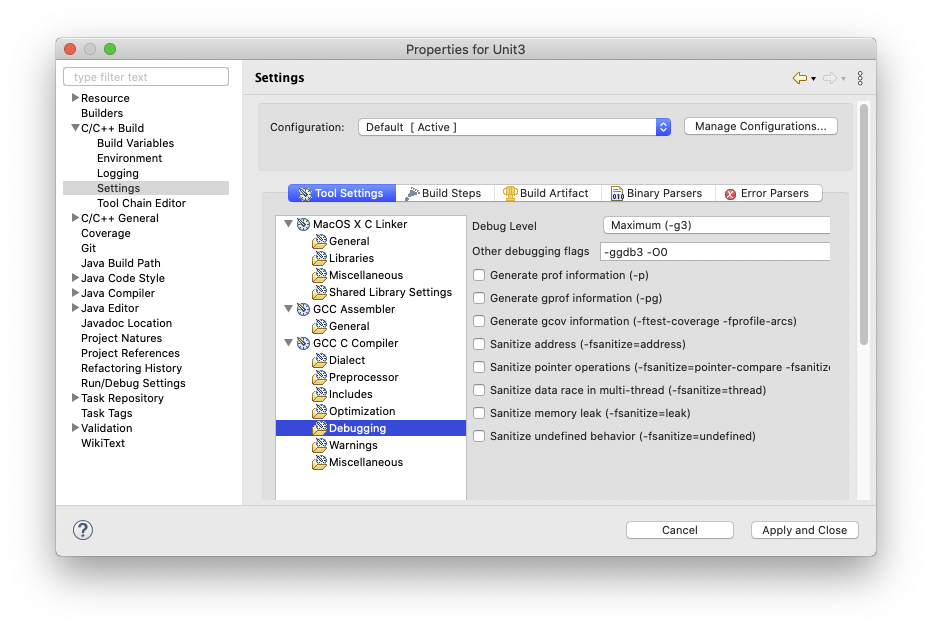
7. Specify -fPIC
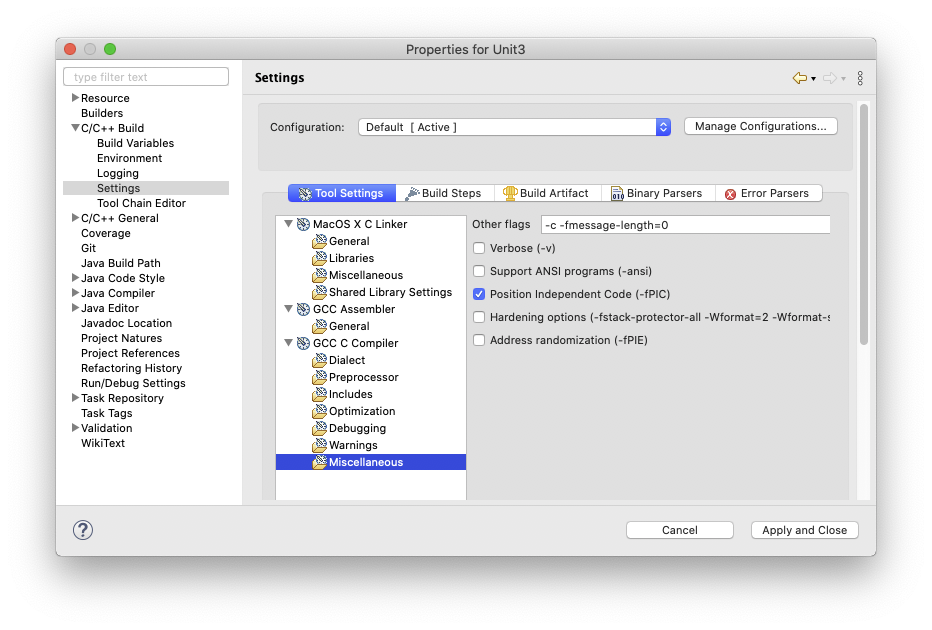
8. Registering Build Artifact
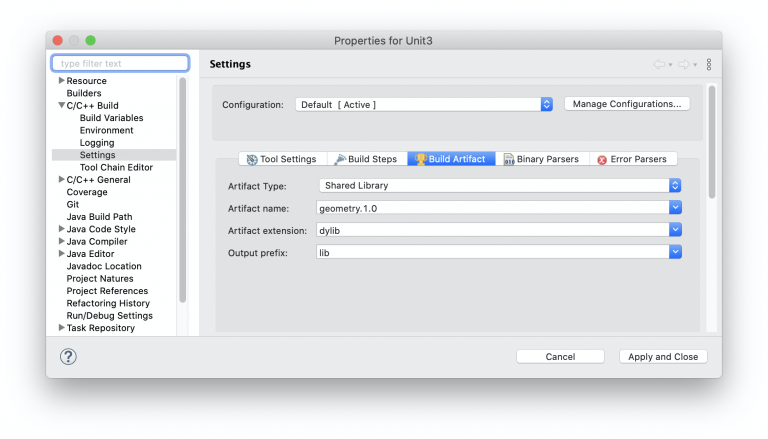
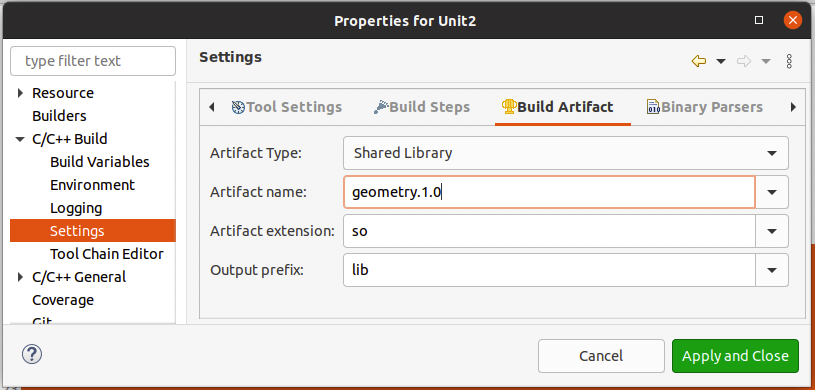
for linux:
9. Press Build

Sharing data in JNI or a closer look at JNI Wrapper
Let’s take a look at our generated wrapper function. In particular, we are interested in the parameters that we receive in our function:
JNIEXPORT jint JNICALL Java_com_units_geometry_Geometry_getRectangleArea
(JNIEnv *env, jobject obj, jobject jrectangle)
The first parameter is a pointer to the JNINativeInterface_ structure
storing pointers to all JNI system functions. You can view a complete list of them in jni.h, or better yet, in the documentation.
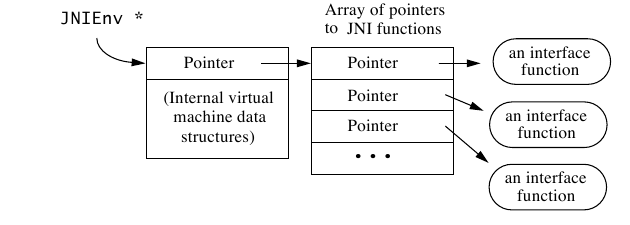
The second parameter is a reference to a Java object inside which our method is declared with a native instruction: in our case, it is a reference to an object of the Geometry class. We can use this link to call the necessary methods of this object. This is very useful in real-life projects since formally you need to convert object-oriented logic into functional logic, and through this link, you can call a Java method in the JNI Wrapper.
Most often, in JNI Wrapper, the data is mapped and then transferred to native code. In fact, everything is not so complicated here, but it is very inconvenient and ugly, especially when it comes to transferring collections and arrays of objects. Fortunately, we do not need to do it often.
The most dangerous thing about all this is the memory leak and friendship with the Garbage Collector, since it is difficult to notice it in the JNI part at the development stage, and it is almost impossible to catch in production. We need to understand how the Garbage Collector works more than ever, especially with the JNI part. We will play with all of this in future articles, and CAN will be very helpful since we will be able to see the cost of caching references to fields or objects in JNI as well as what will happen with our native code when the GC decides to delete the object that we still need.
JNI Debug (println vs gdb / lldb)
First debug with println / printf
No matter how cool the debugger is and no matter how intuitive the IDE is, many programmers, me being no exception, try to debug using a trace of messages to the console first. So the first line of defense for most of us is System.out.println on the Java side and printf on the C side. But if you noticed, the messages in the console are not displayed in the correct order, when you run the code:

It should be borne in mind that when we use printf (or any other analogue) we write to a STDOUT stream, which, in turn, is buffered, and until the buffer is filled or we physically release it into the world, we will not see anything on the screen. To solve this problem, either call fflush after each printf command:
printf(“Width: %d\n”, jwidth);
fflush(stdout);
or, in general, we can say that the buffer will be NULL, and then everything that you write to the stream will immediately enter it without buffering:
setbuf(stdout, NULL);
and now we rebuild the project and run our application:
Bingo! Now we can start debugging with the good old tried and true method.
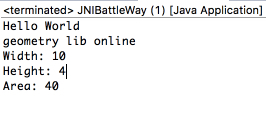
JNI advanced debug with gdb / lldb
In combat projects, there may be situations when just logging and println does not help solve the problem or find what exactly the bug is. Then we need a debugger, but then a problem of how to debug in a project with the JNI part arises, especially when the bug is clearly under the hood of the native library.
For these tasks, you need to use gdb or lldb. It is easier to use gdb on Linux and lldb on MacOS.
GDB is the GNU Debugger, a portable debugger for the GNU project that runs on many UNIX-like systems and can debug many programming languages, including C. It can be used both in Linux and in MacOS, but in MacOS you need to be prepared for the problem of signing the application – this is a separate topic, and I think we will cover it in the future.
LLDB is a high-performance debugger that is used by default in Xcode. It is generally MacOS oriented, which makes it easier to use on MacOS.
In general, lldb and gdb are very similar, but there are differences, which we will consider in the future at more complex stages of our porting the library for CAN.
Let’s debug our application now. Create a copy and name it Unit3:
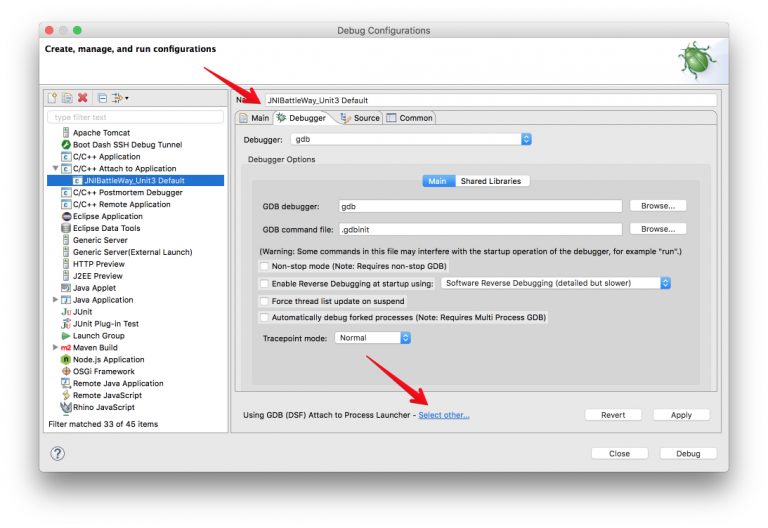
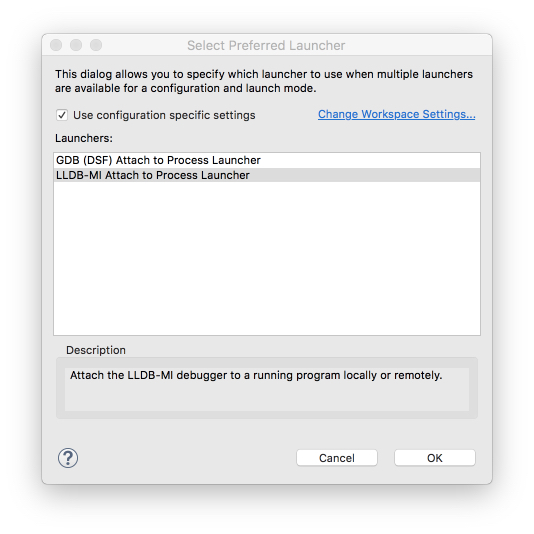
1. We need to create an additional “Debug Configuration” only of the “C / C ++ Attach to Application” type and select the lldb debugger for MacOS (for Linux gdb)
2. Let’s place breakpoint in java part and in our com_units_geometry_Geometry.c
3. We start debugging java application first
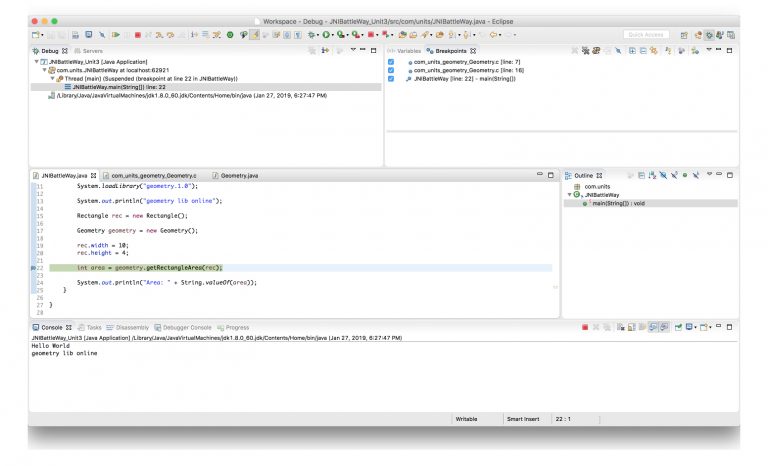
4. In the Debug window, we see our application and the java thread that paused at our breakpoint. Now we start debugging our native process. In this case, we are debugging the native part which lies in the JNI part, which means that we have to debug the java process. As we start our lldb or gdb, it will ask us to indicate the PID of the process that needs to be debugged. We indicate our java process (you can simply type java in the search bar, you can look at the PID of your running process in the console, or you can write a simple couple of lines for logging in which you will indicate the PID)
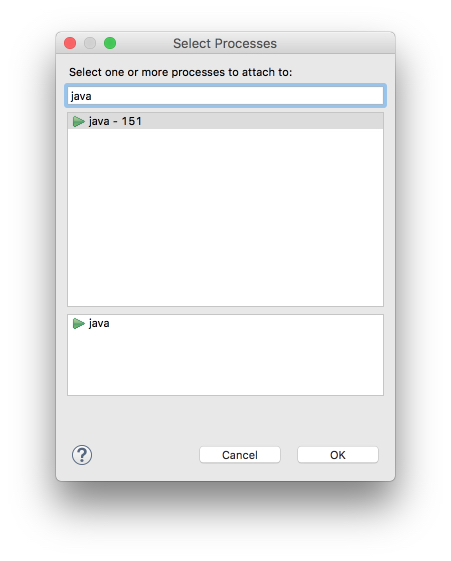
5. After we join the process, the debugger will stop at mach_msg_trap or some similar native function by default. You need to let the process go further.
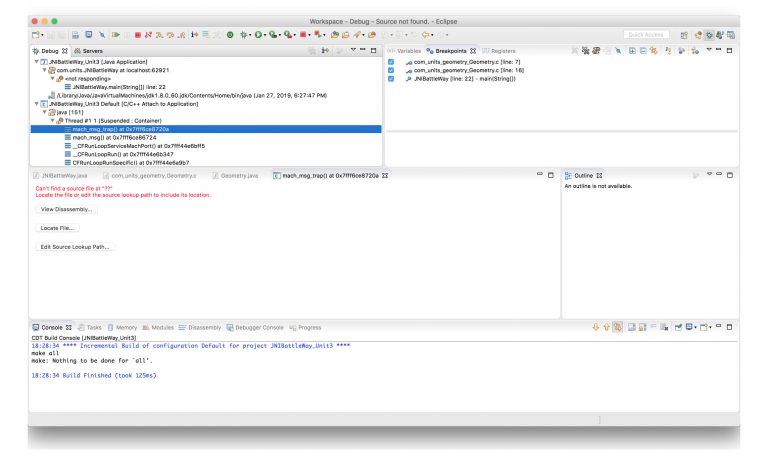
6. Now we can release our breakpoint in the java part and now our debugger works both with the java part and with the native one. The only thing to watch for is which process you have selected in the Debug window, so as not to be confused about where you release the breakpoint.
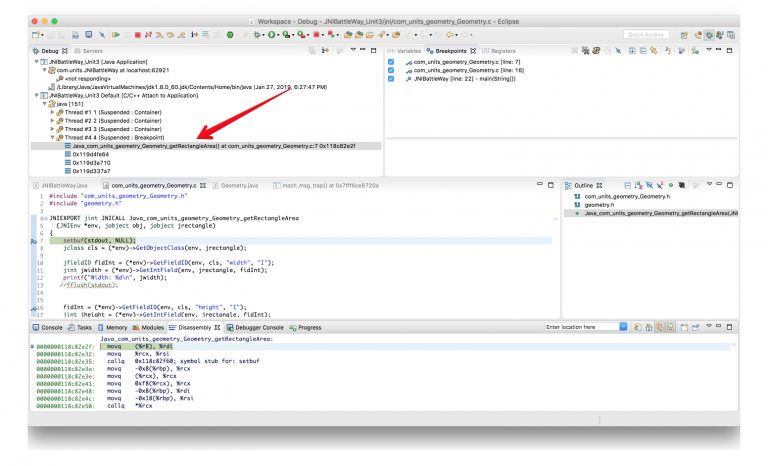
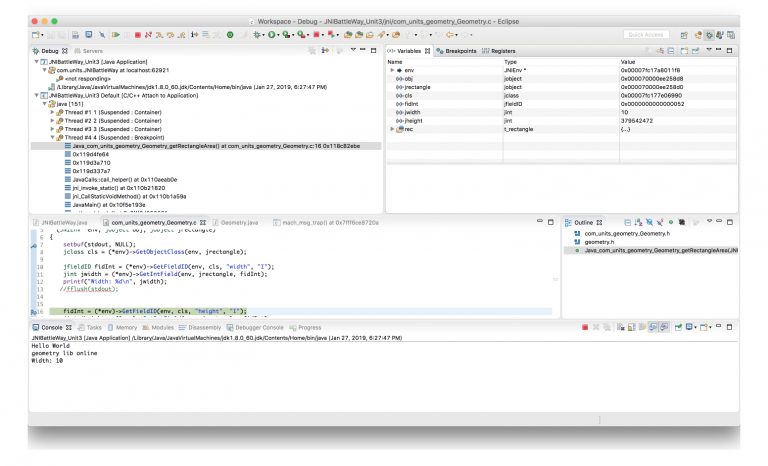
Now we can conduct a full-fledged investigation and search for our bugs in the native part of our app.
Possible problems with GDB and LLDB
Could not determine version using command…Unexpected output format
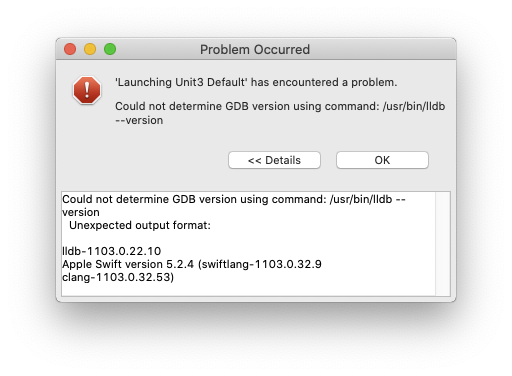
This problem is common on MacOS:
The lldb-mi not longer present from Xcode 11.x, but lldb and LLDB.Framework already included in the Xcode. Use the lldb-mi that comes bundled with previous versions of XCode( 10.x) , the location is ‘Xcode.app/Contents/Developer/usr/bin/lldb-mi’, copy it to the same location of current version XCode.
The problem is that lldb-mi is no longer included in the lldb project since August 2019 and has been moved to a separate project https://github.com/lldb-tools/lldb-mi. To solve this problem, you need to compile this module separately.
Unable to find Mach task port for process-id
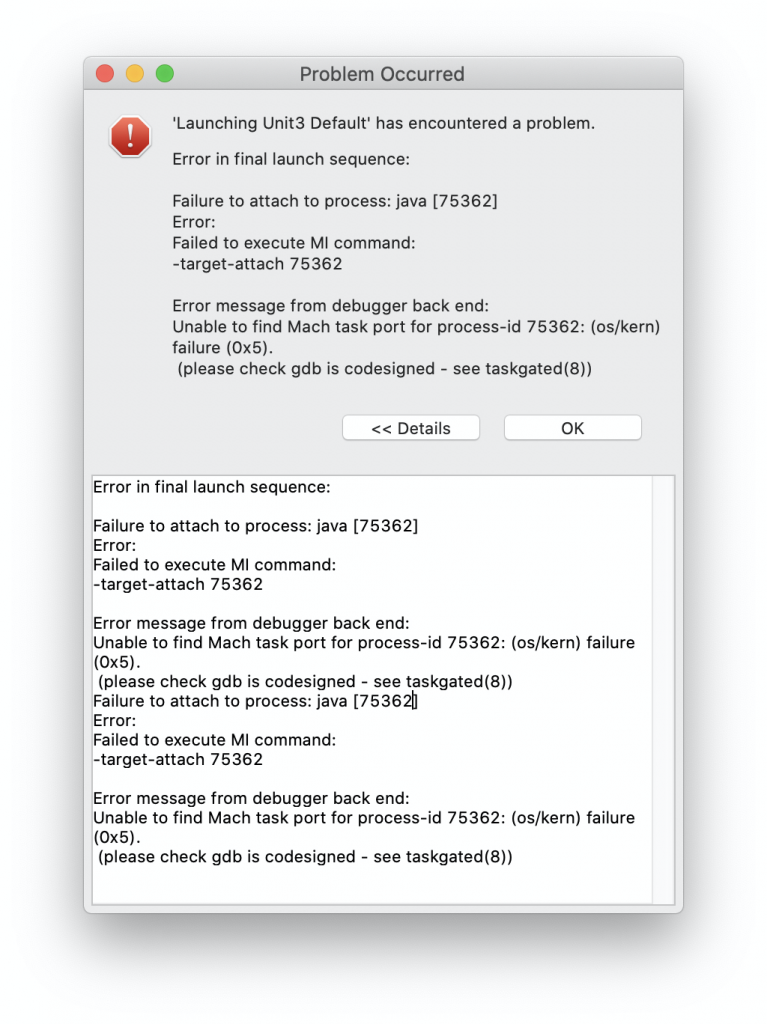
Error in final launch sequence:
Failure to attach to process: java [75362]
Error:
Failed to execute MI command:
-target-attach 75362
Error message from debugger back end:
Unable to find Mach task port for process-id 75362: (os/kern) failure (0x5).
(please check gdb is codesigned – see taskgated(8))
Failure to attach to process: java [75362]
Error:
Failed to execute MI command:
-target-attach 75362
Error message from debugger back end:
Unable to find Mach task port for process-id 75362: (os/kern) failure (0x5).
(please check gdb is codesigned – see taskgated(8))
To solve this problem, you need to sign the app with a certificate (codesign).
Failed to execute MI command. Operation not permitted.
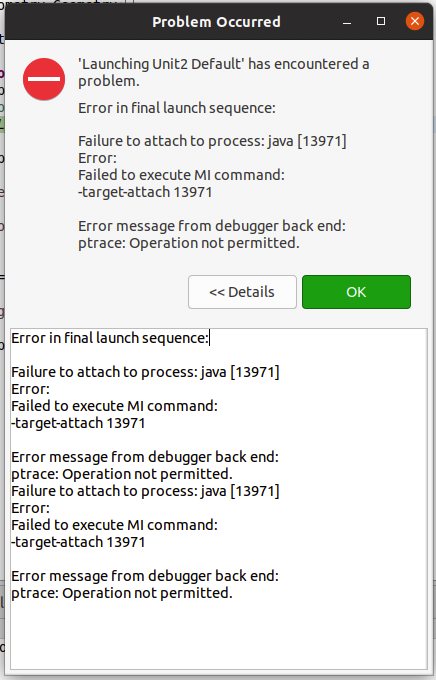
To solve this problem, you need to sign the app with a certificate (codesign) or run Eclipse as root (sudo)
Summary
One of the biggest problems when dealing with JNI is that knowing Java and C is not enough to ensure the reliable operation of your app. The goal of these articles is to describe how to work and catch bugs in such a difficult symbiosis, and to dissuade people from optimizing their apps by rewriting part of Java logic in C for the sake of performance. I hope this article helps if the support or development of a project with the JNI part falls on your shoulders.


